Why I started blogging
Blogging NEEDs to be a part of every business – If I dive into Google Analytics and look into “All Traffic” it’s the old blog posts that are driving my traffic! And I like to advise – rather than focusing on new content make the old content stand out and edit it.
What to do this yourself?
Well if you’re up for it I’ve written a guide with the awesome people over at Bluehost. Bluehost is the #1 recommended web hosting provider by WordPress.org so it must be good right?
Step 1: Visit Bluehost.com

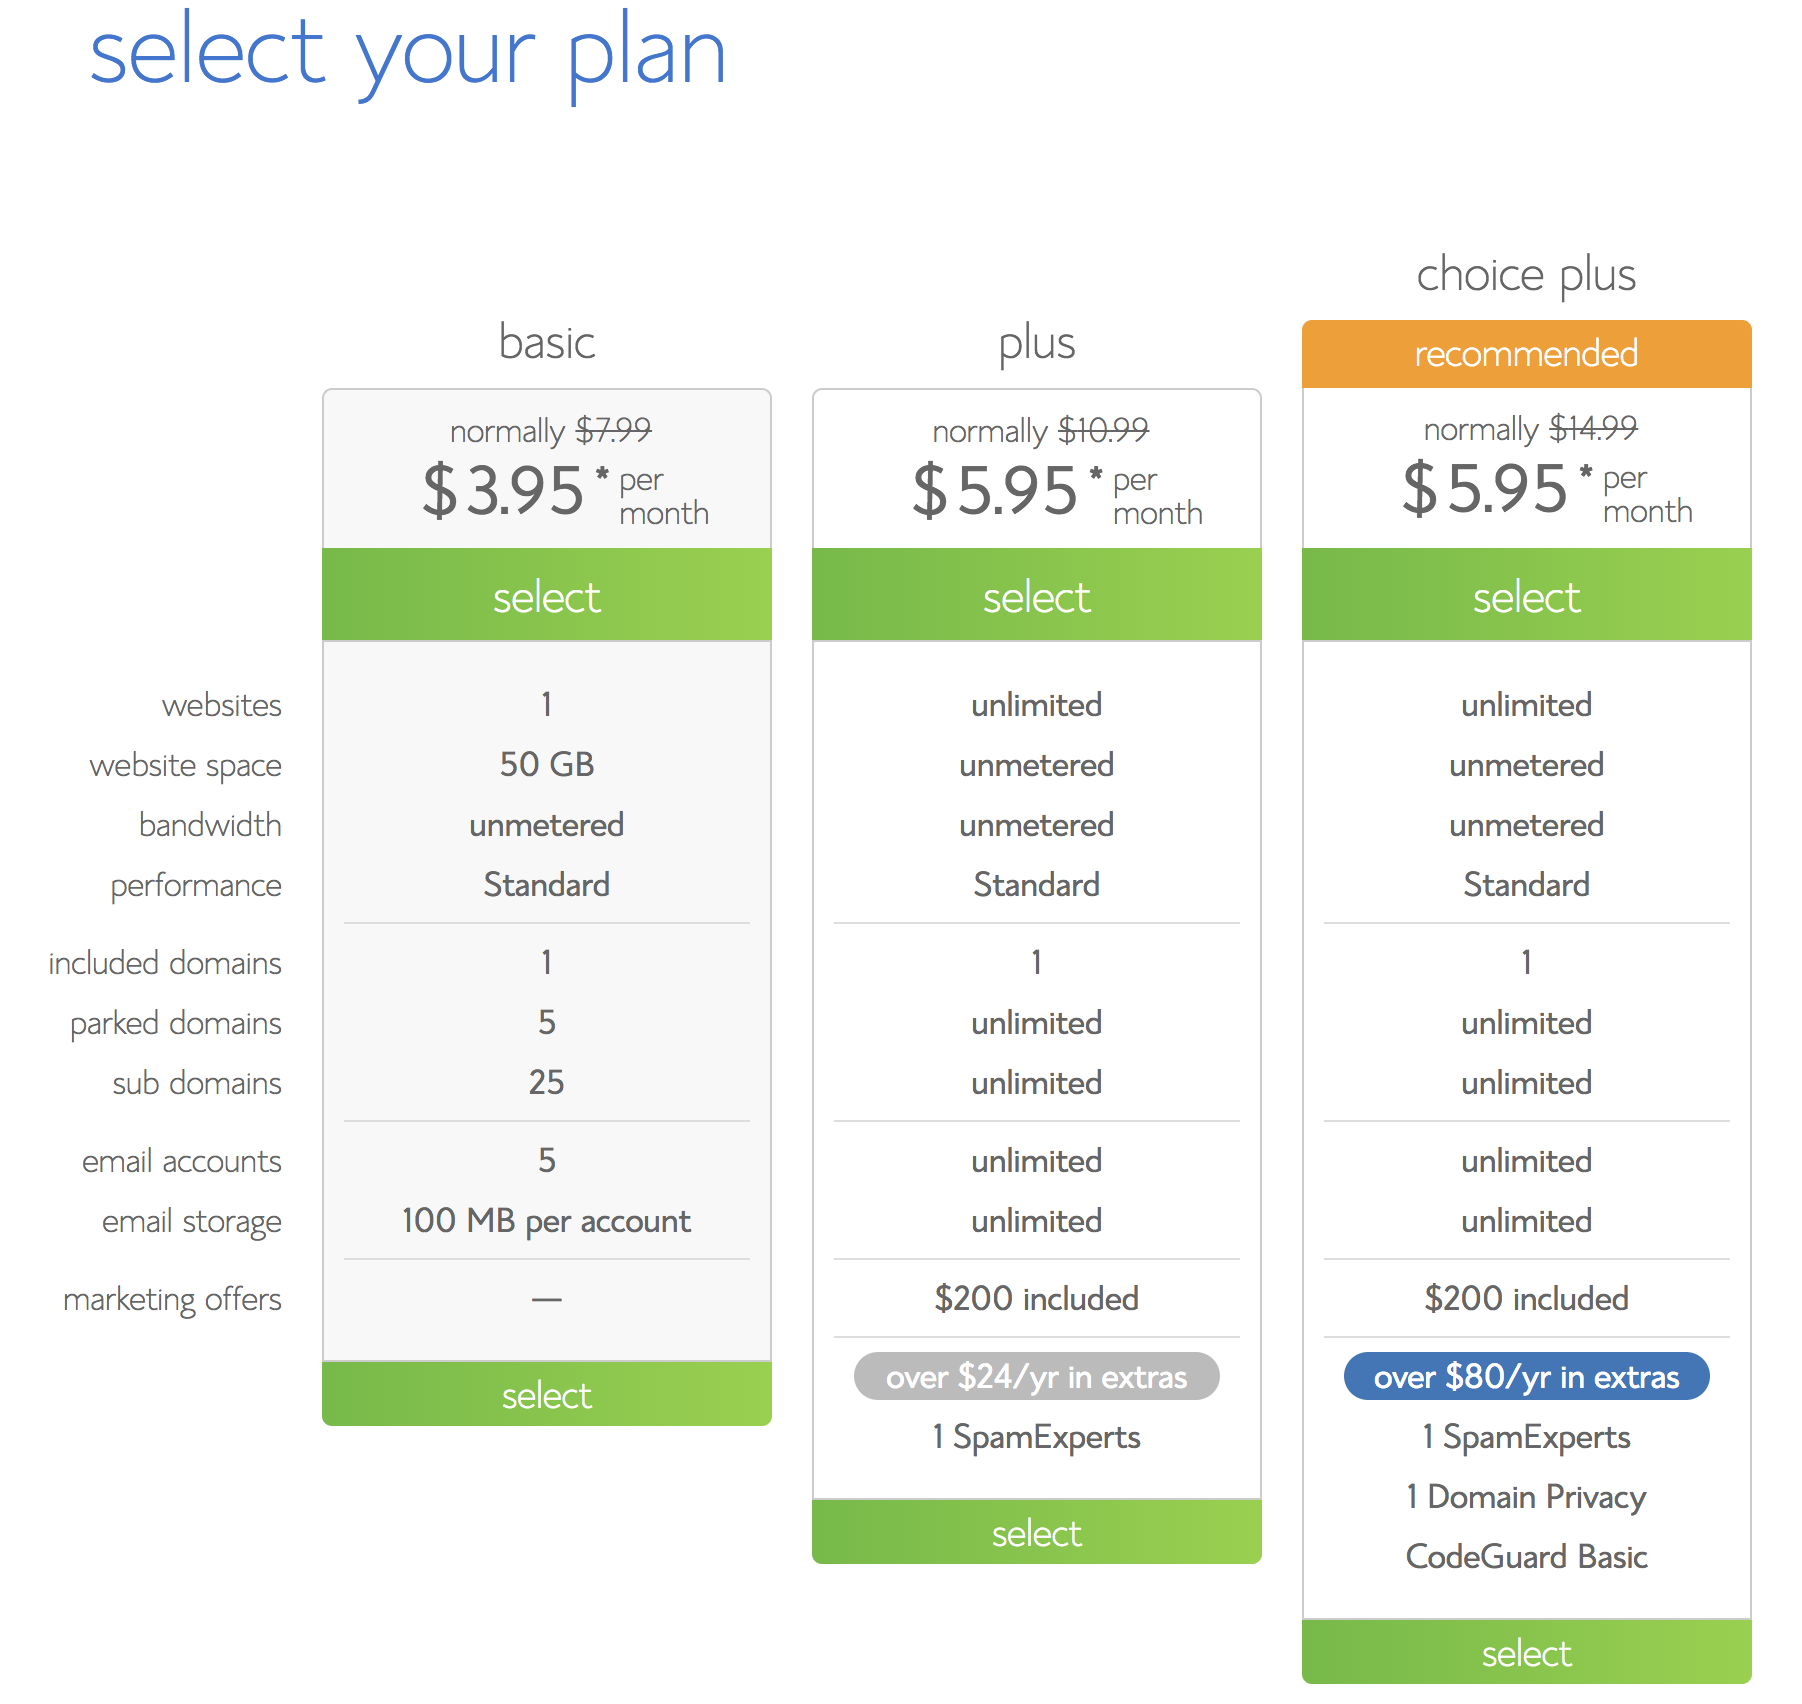
Head over to Bluehost.com and click the “get started now” button to create your account. Select a hosting plan that fits your needs. (Normally, if you are just starting out I recommend the basic plan but, if you are really serious about this and want more resources & power go with their Plus, Choice Plus or Pro plan). Keep in mind, you can always upgrade your plan as you grow.
Step 2: Domain Name
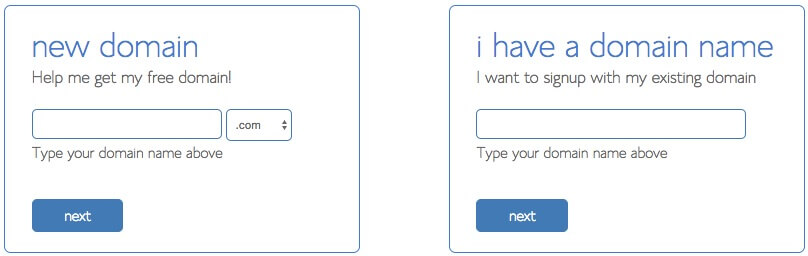
Type your desired domain name in with this nifty Domain Name Checker. Your domain should be unique and easy to say out loud if you were quoting your email address. Nobody wants Stephanie@stephaniecampanella.com it’s hideous!!! I loved using tradiesgo.com.au as my main domain instead of tradiesgetonline.com.au because it was smaller – so do the same. But buy both! Buy as many domains as possible that are close to your brand otherwise someone else will take it. They may even pretend to be you. If you already have a domain name, type it in the “I have a domain name” step.

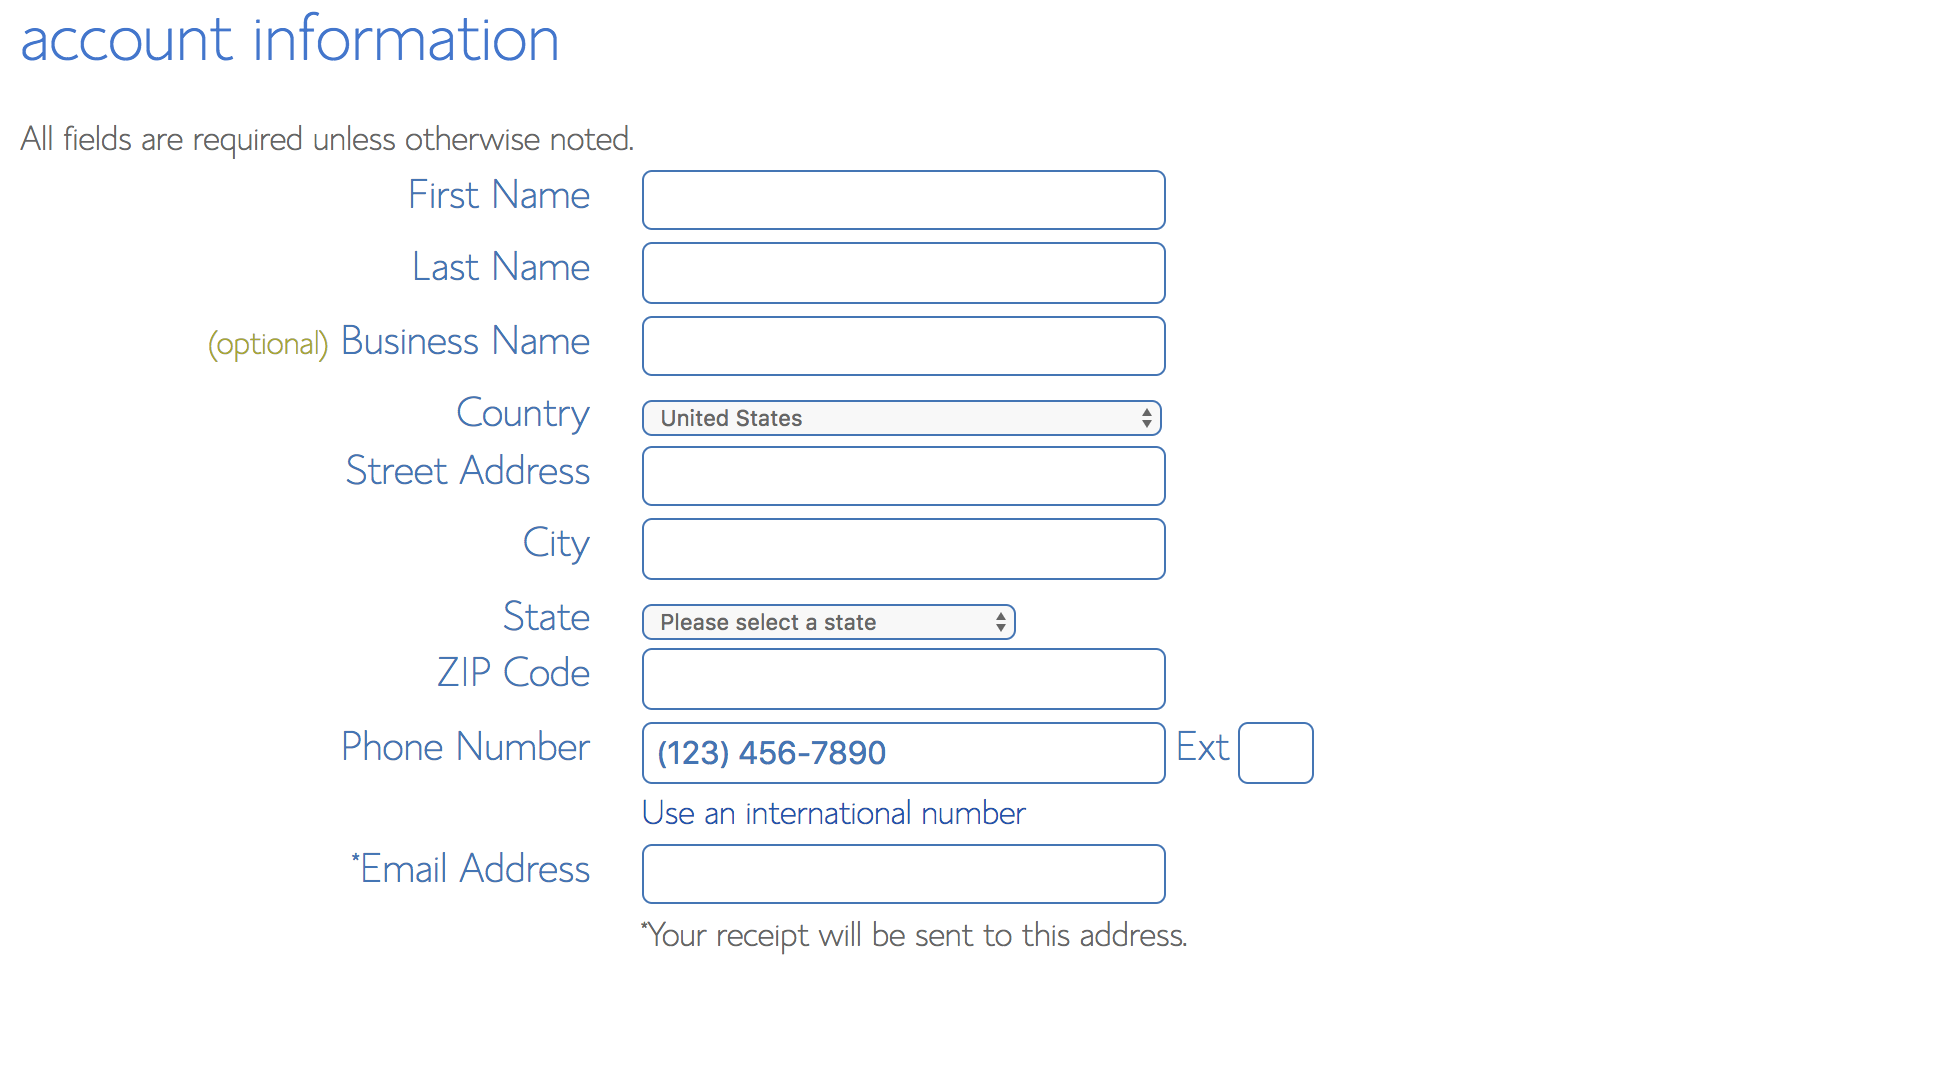
Fill out your account and billing information…
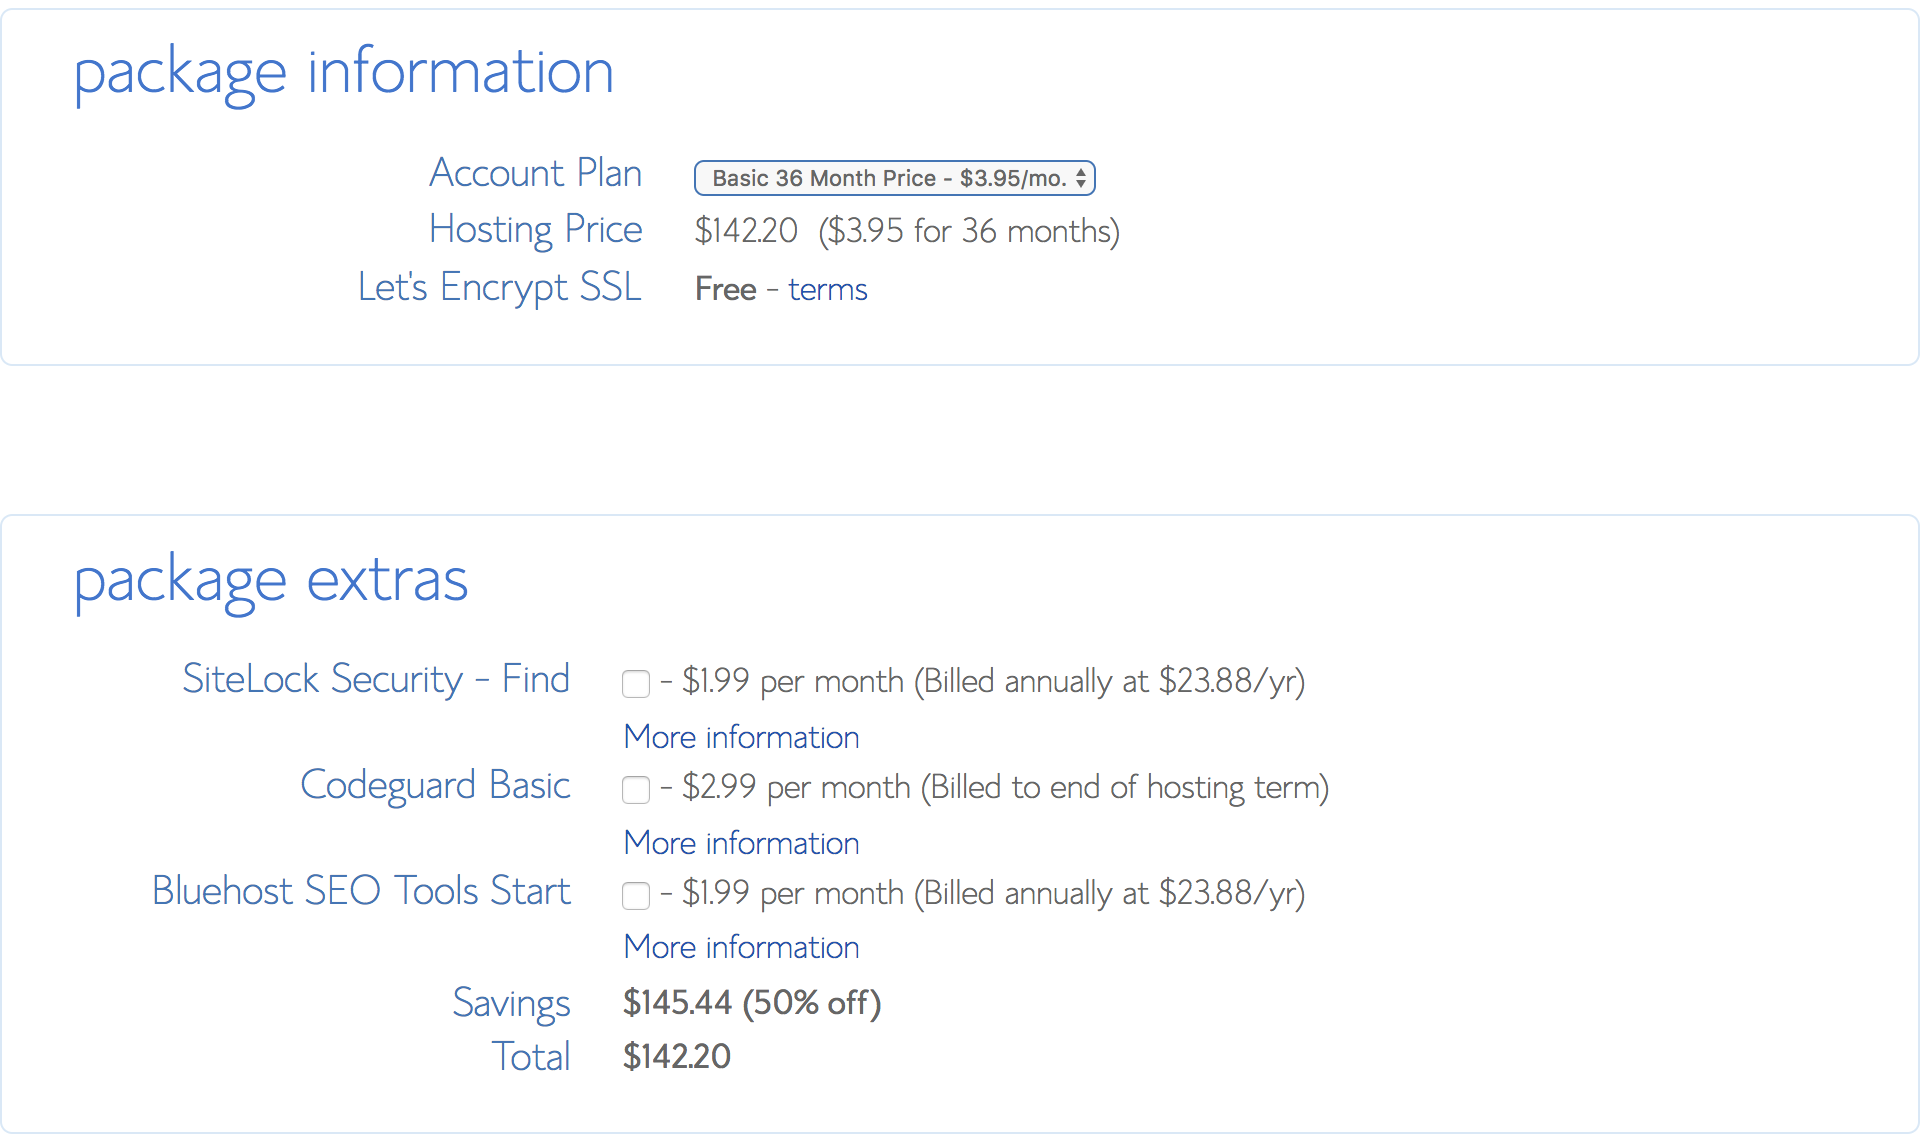
Review the package information and decide what term/add-ons are desired. The biggest bang for your buck is on the 60-month term, but you can choose 36 months, 24 months or 12 months. *Note, Bluehost will charge you upfront for the entire term.
Simply pay via card and accept the terms.

Yahoo! Your hosting account has been created! The crew at Bluehost will send you a welcome email confirming account and FTP information.
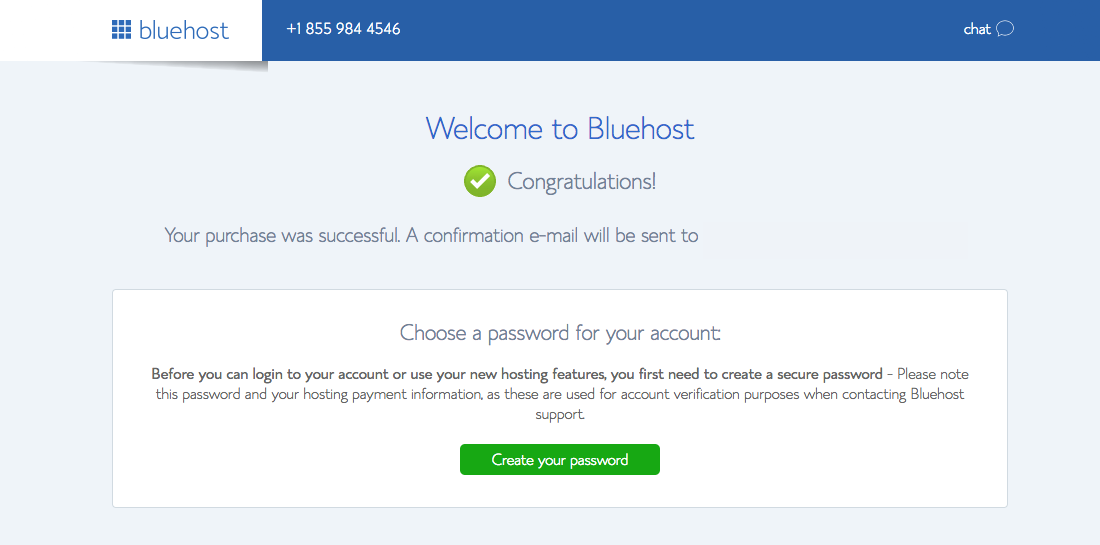
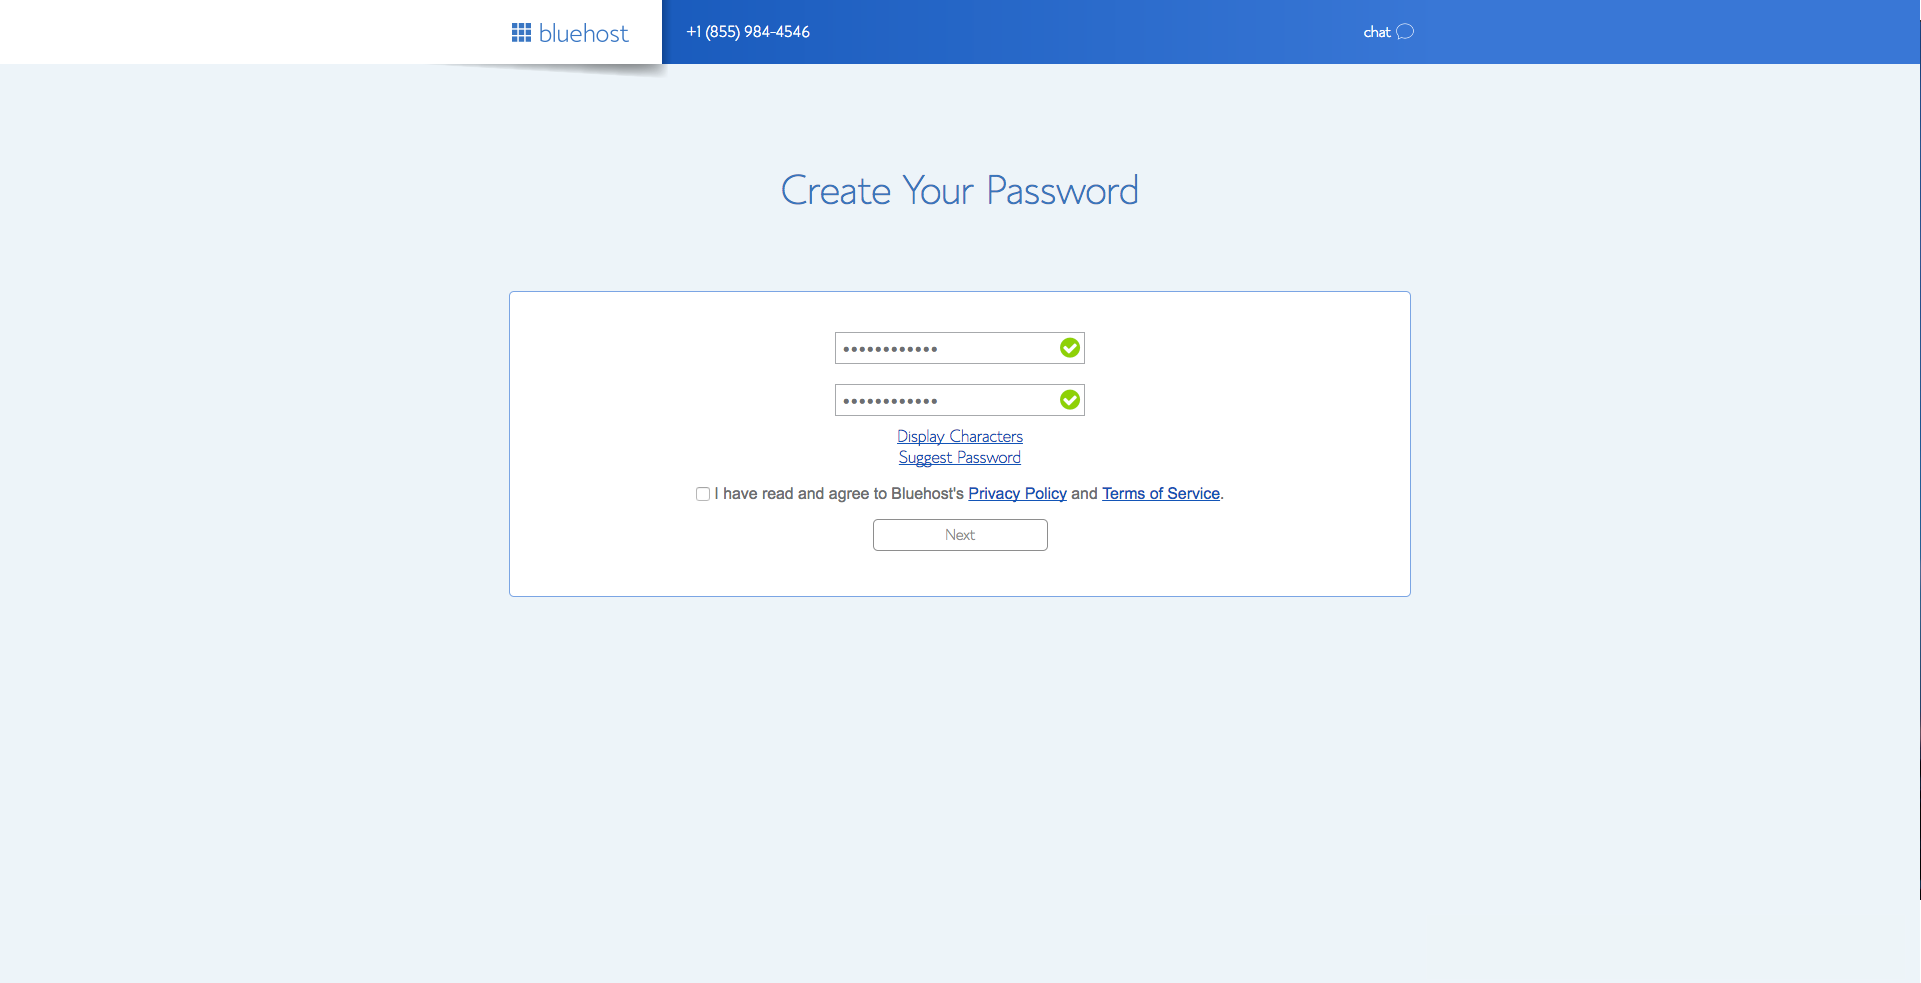
Create your password. Make sure to review the requirements for creating the password. If you need help you can always click the “Suggest Password” option. Regardless, I recommend writing this down just to be safe. You’ll end up needing it later on.
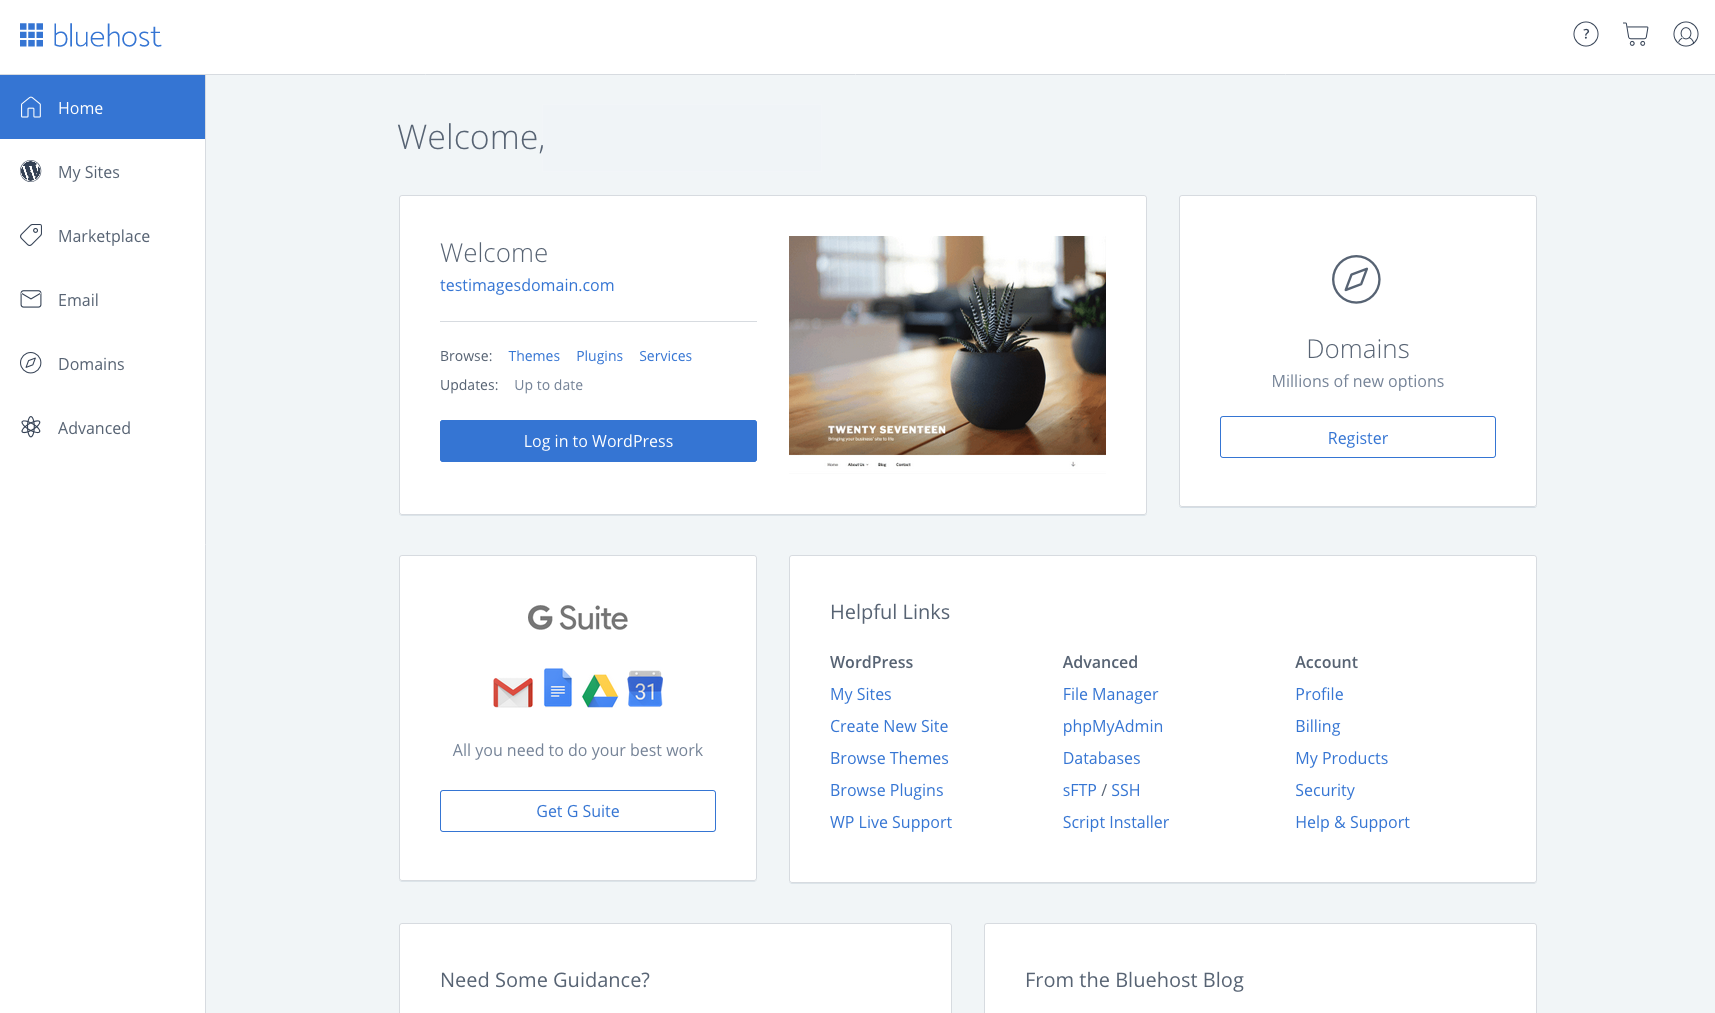
Go ahead and log in and start getting familiar with your new Bluehost account.

Step 3: WordPress
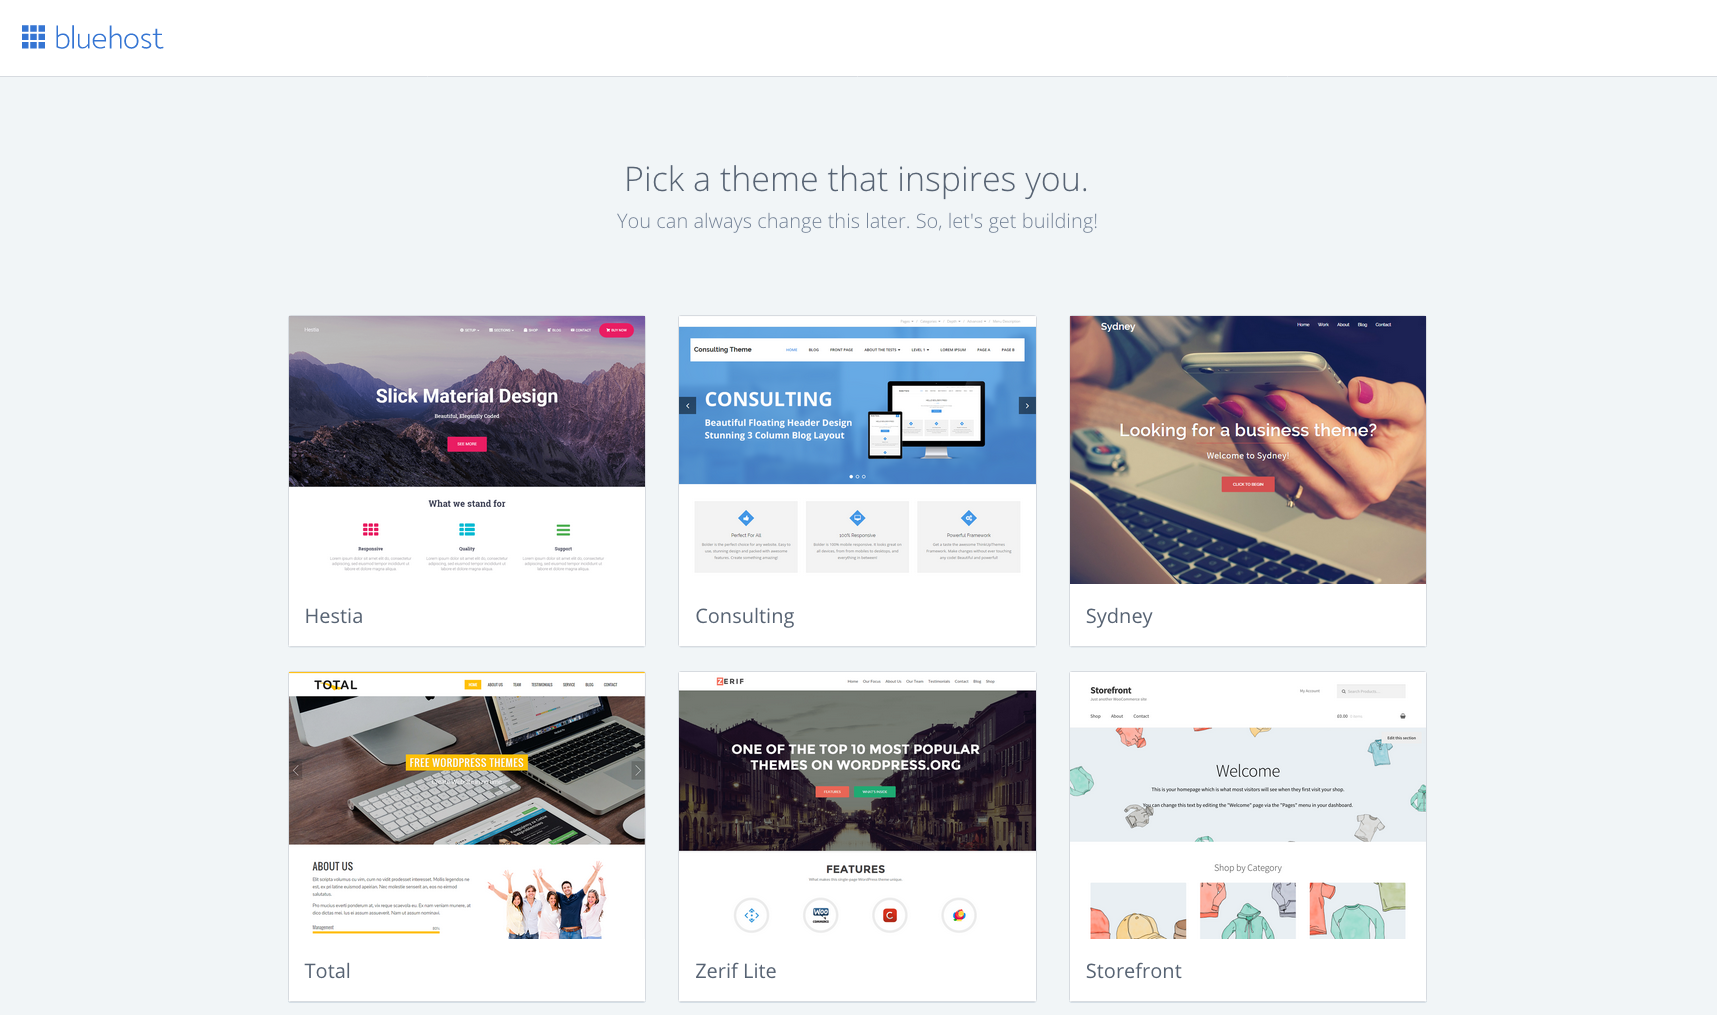
Thanks to Bluehost, after your hosting account has been created, WordPress will automatically install. Start off by picking a theme, these are all free themes from WordPress.org.
Now that you’ve picked your theme, let’s jump into WordPress and get you even closer to constructing that first blog post.

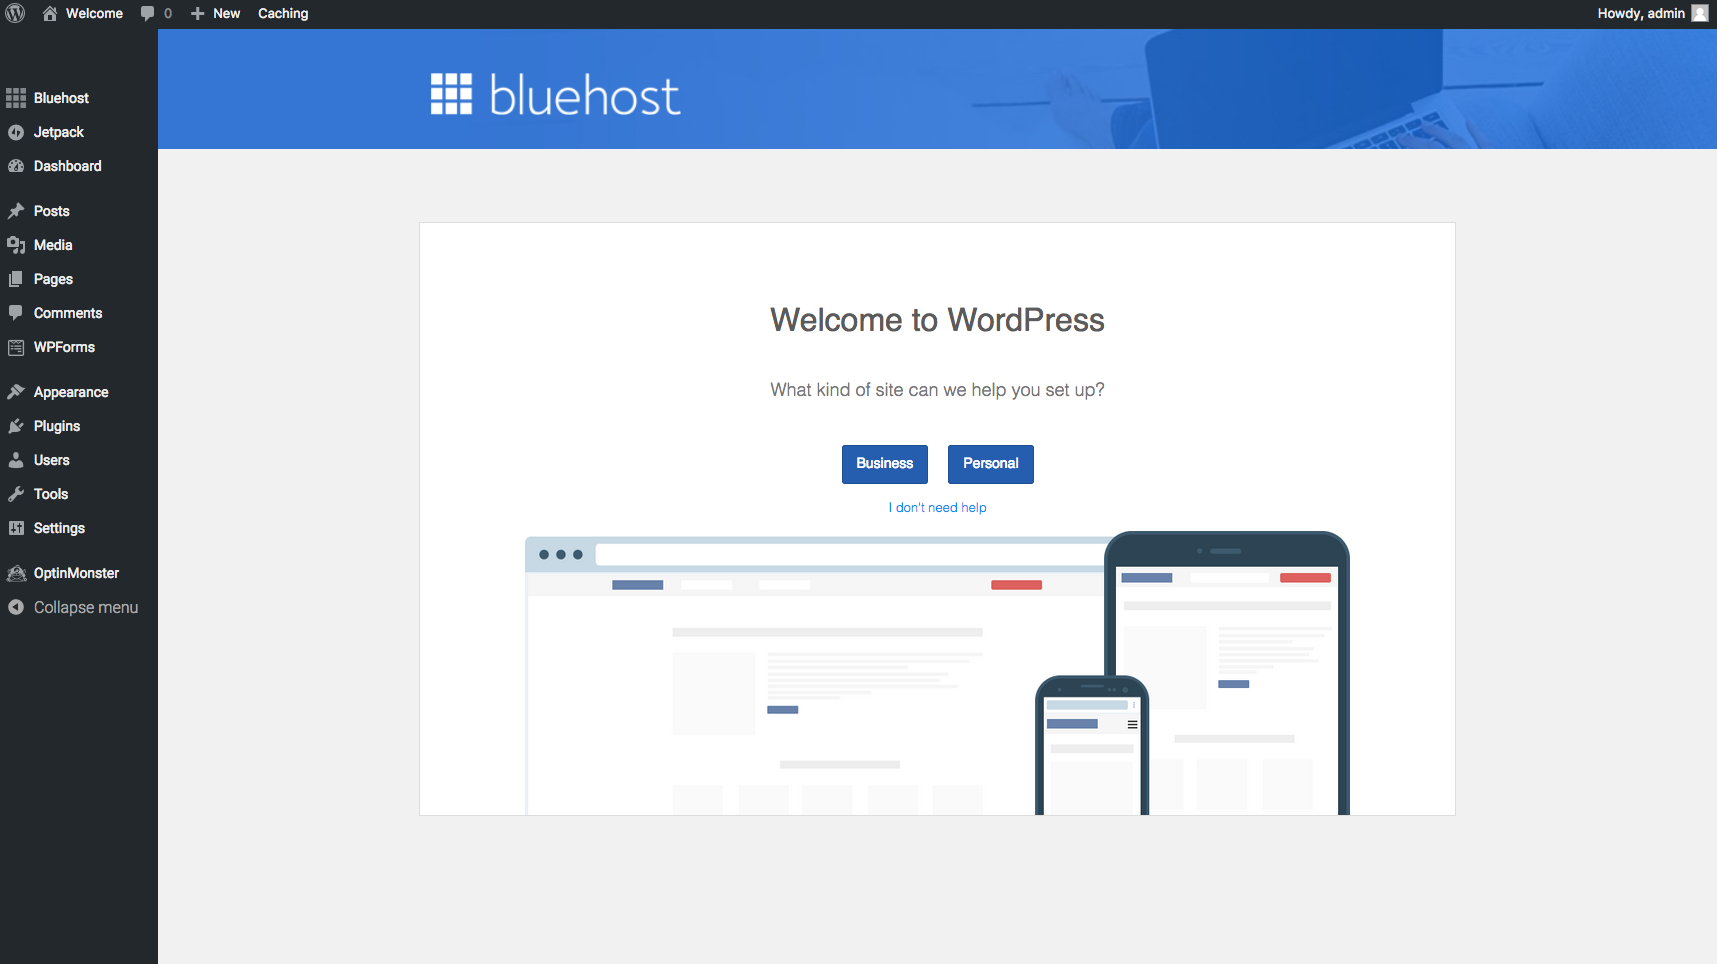
Decide whether this site will be for business or personal use.
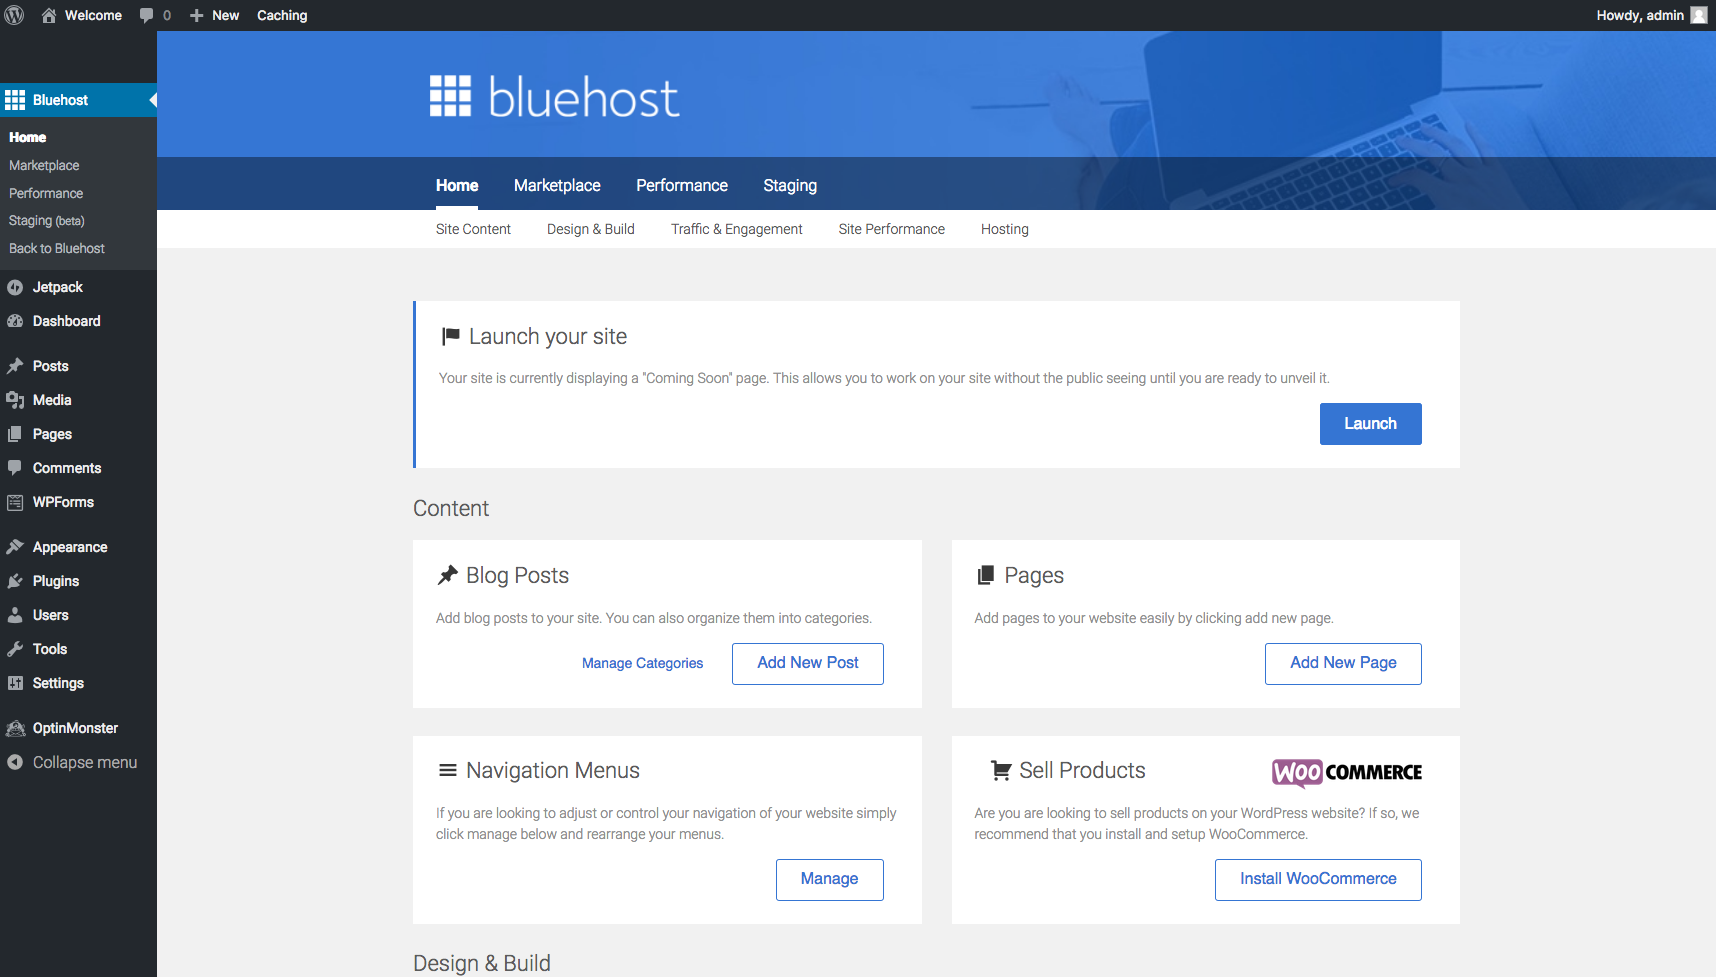
On this step, you’ll see an overview of Bluehost+WordPress integration. You can manage WordPress plugins and blog posts or pages here.
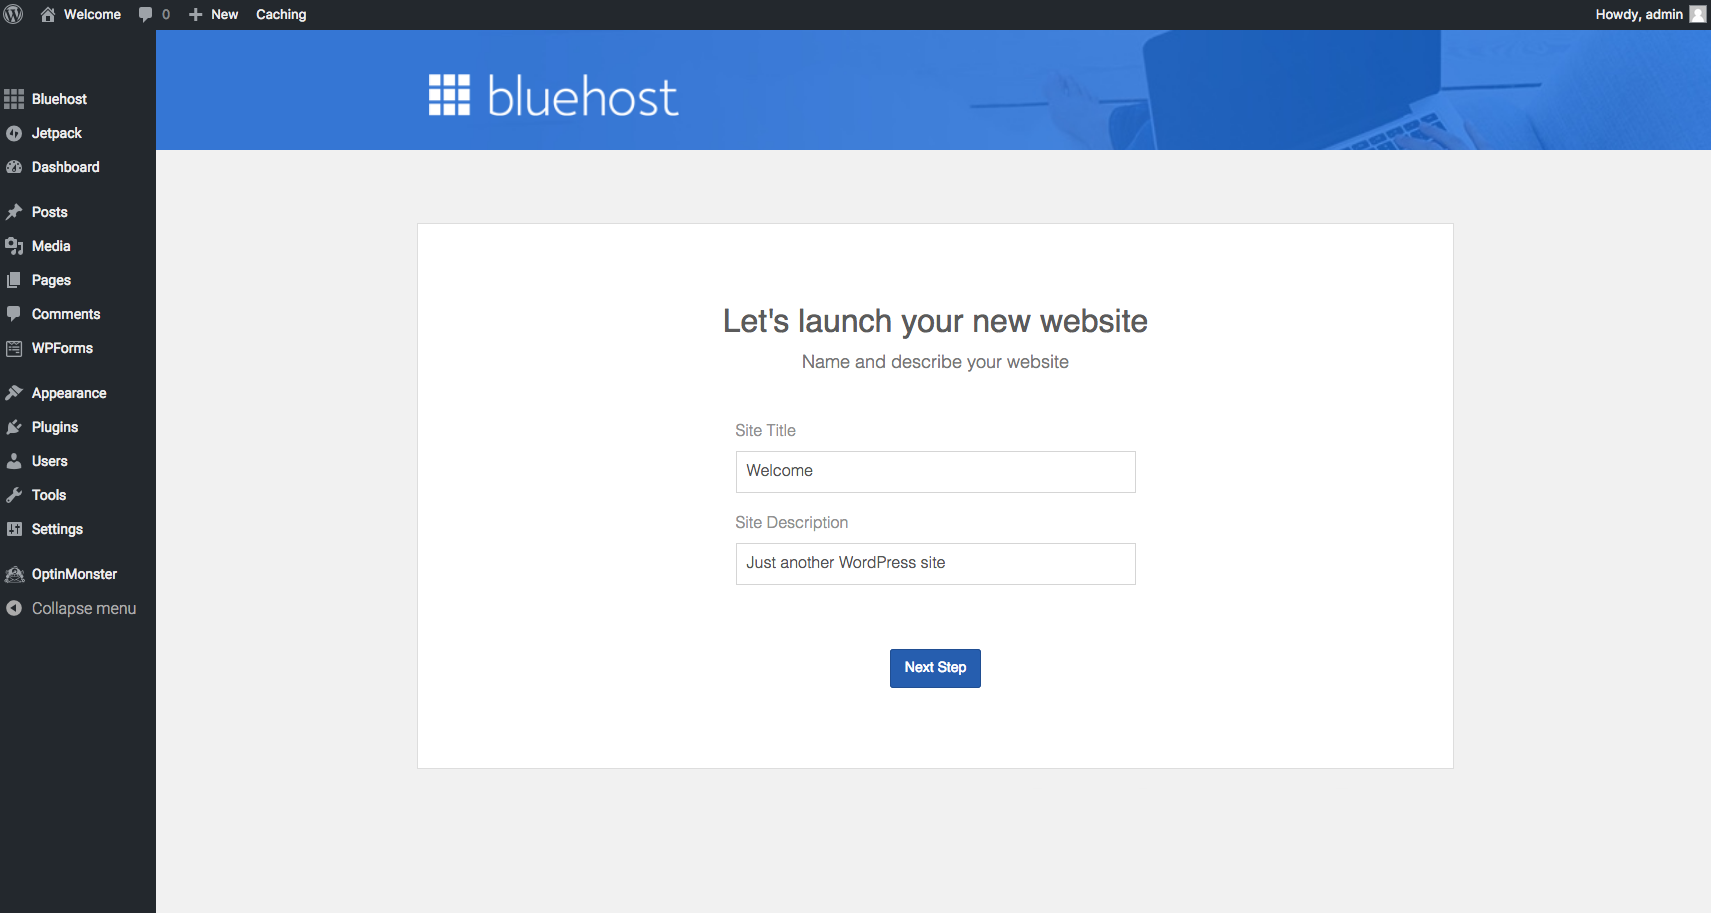
Decide on a site title and description here.
Here’s a revamped dashboard of the Bluehost control panel.
Now you can make your site look how you want! Since you are using WordPress the sky’s the limit!
Start Publishing
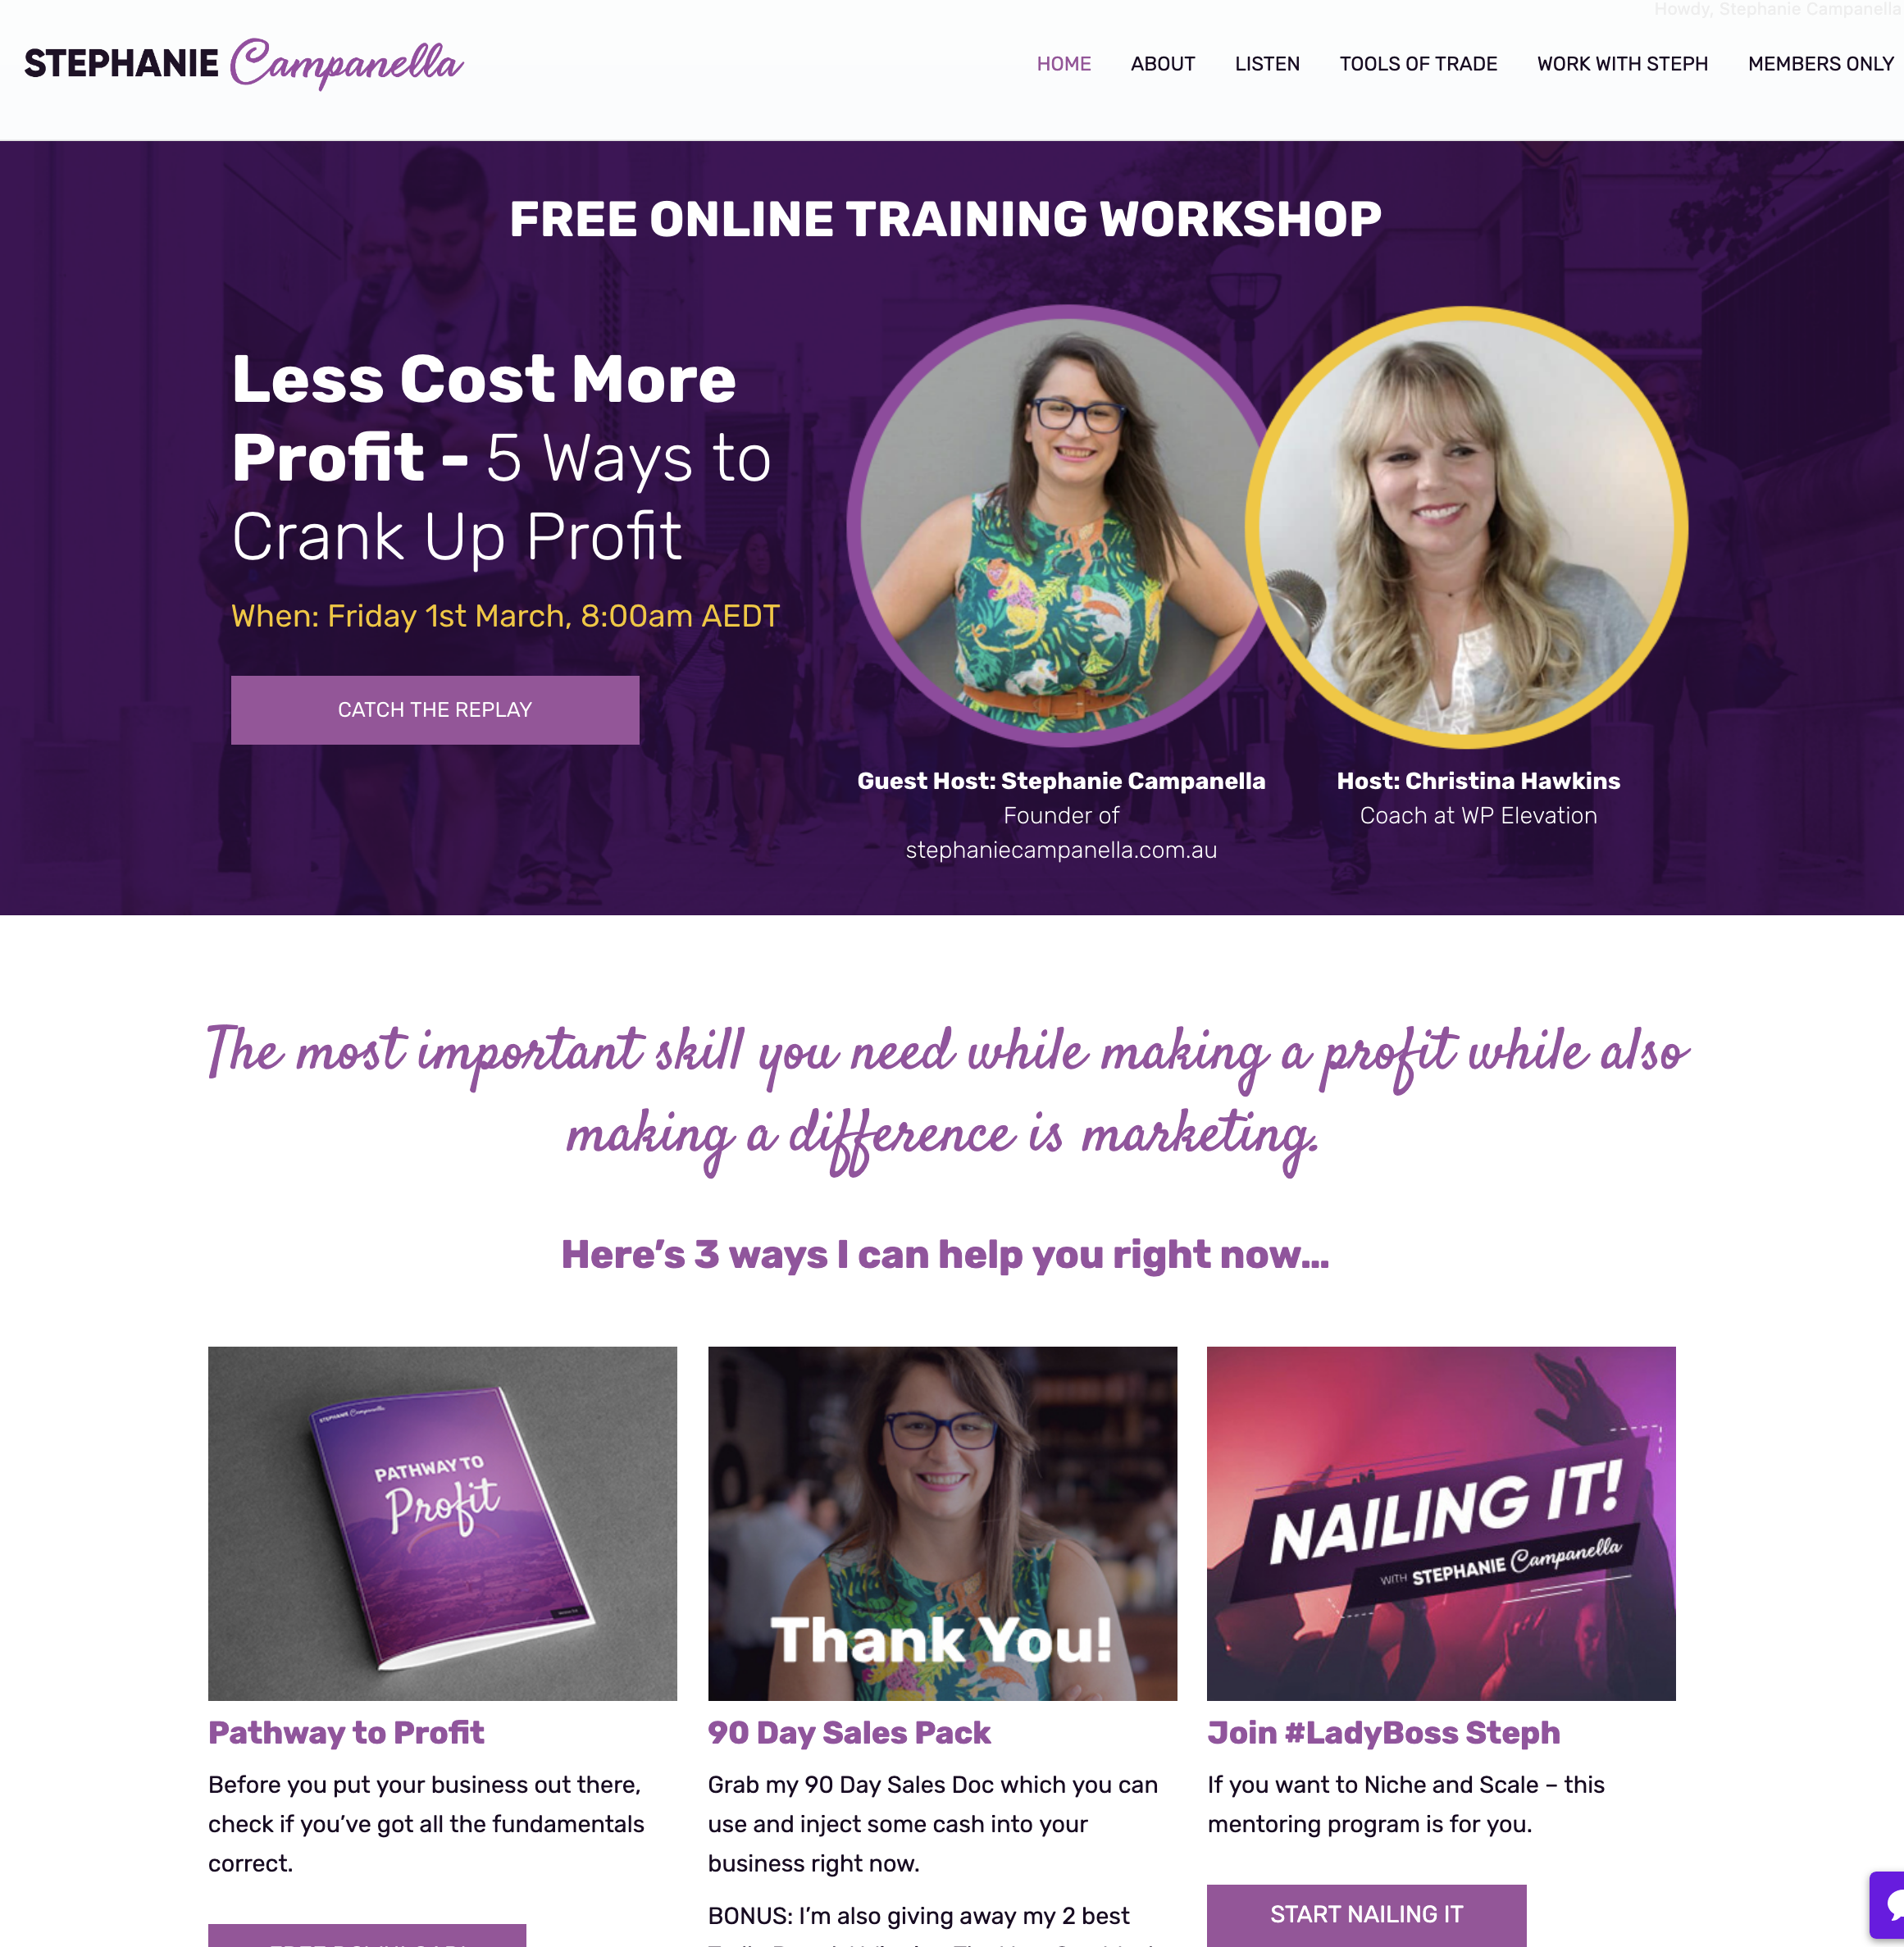
Your homepage is a round-a-bout. It’s job is to steer people in the right direction. I always like to give people a nice big welcome (the banner) then 3 options. See mine below…
Email Marketing
If you want to get serious about Email – then you should sign up to Active Campaign.
Active Campaign has SO MANY features – I need another blog post for it.
Yes this article has affiliate links. These affiliate links pay for Stingers’ (my pug) chew toys.
